LS One POS Display
When you have logged into the POS your layout could look something like this:
LS One POS display (Supermarket)
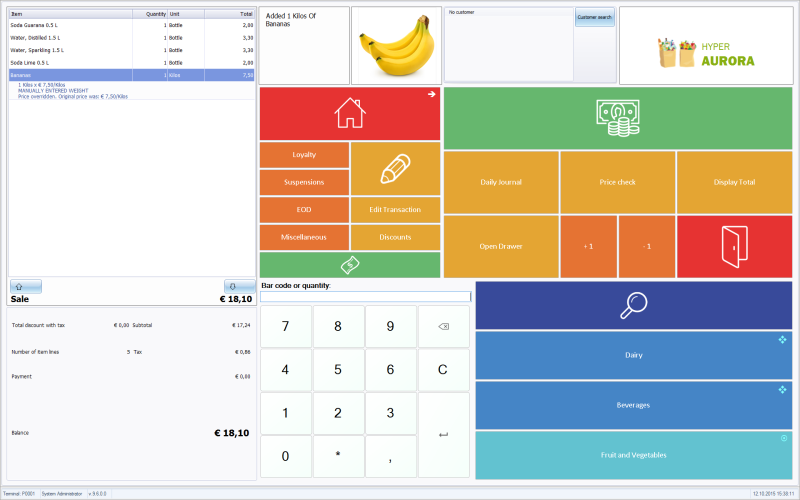
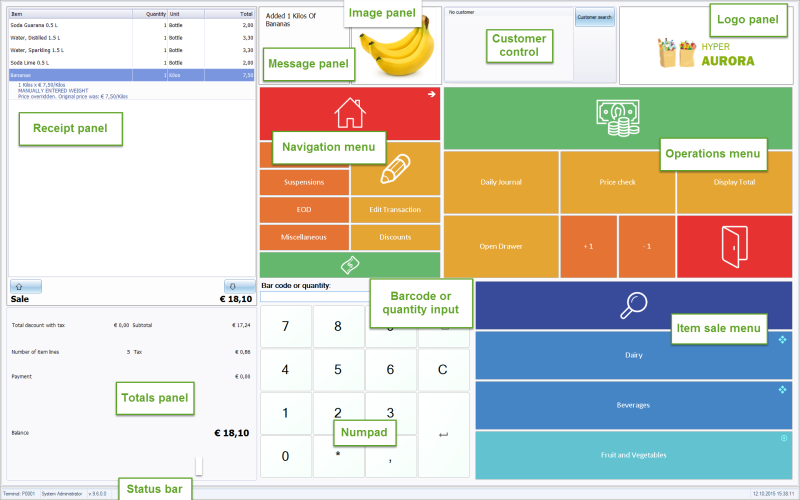
The LS One POS screen consists of different parts that are explained in the table after the figure.
LS One POS parts

See more about touch button menus in the Site Manager and POS in Profiles.
- Open the POS.
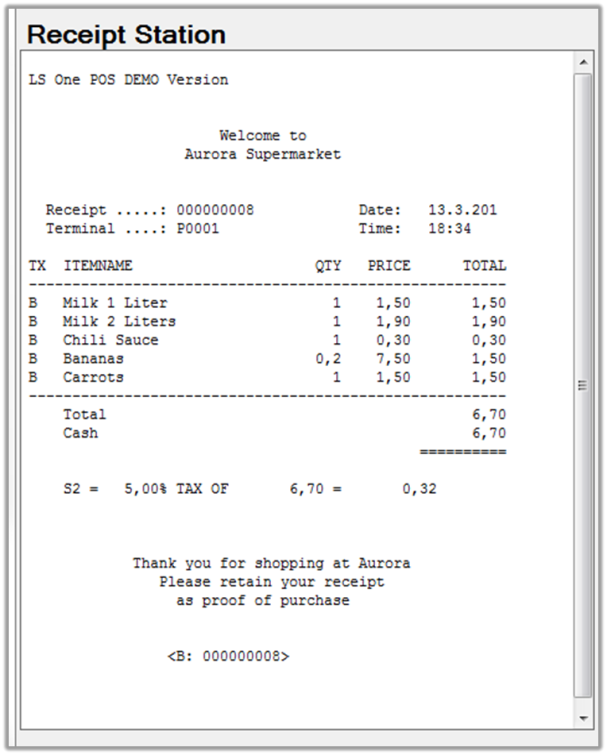
- Press the button Dairy.
- Press the buttons Milk 1Liter and Milk 2Liters and then button Home.
- Type 34073 into the input panel and press Enter.
- Type in the bar code number 1115506444551 and press Enter. (You can also scan a bar code in if you have the scanner attached).
- Press the Item Search button.
Type Carrots and press Enter.
Select the line with item 20050, Carrots, Vegetables.
Press the button Select.
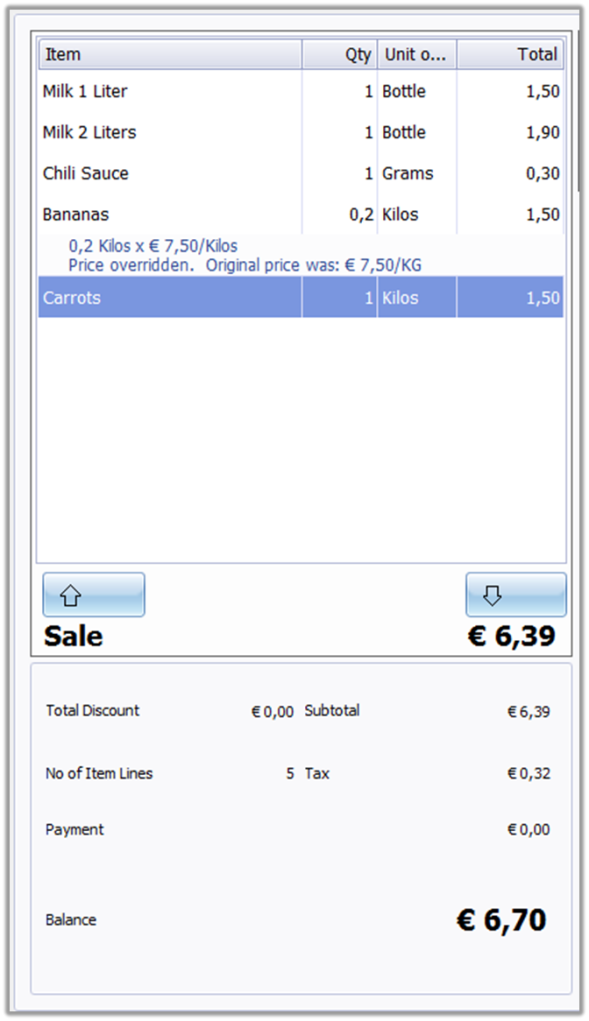
- Five items are now in the receipt panel.
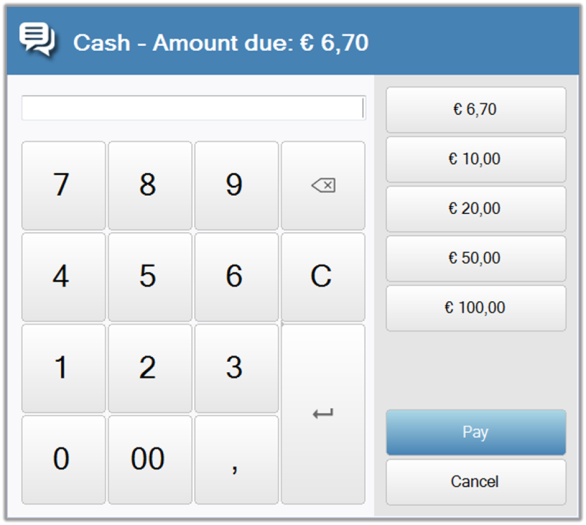
The totals of the sale are displayed in the total panel. - Press the CASH button and a cash window appears.
- Press the quick payment button.
- The sale is finished and the receipt prints.
| Updated: | 8th February 2015 |
| Version: | LS One 2015.1 |

